from __future__ import print_function
import base64
import boto3
from boto3.dynamodb.conditions import Key, Attr
import json
import os
import traceback

#-----Dynamo Info change here------
TABLE_NAME = os.environ.get('TABLE_NAME', "default")
DDB_PRIMARY_KEY = "deviceid"
DDB_SORT_KEY = "timestamp"
DDB_ATTR = "temp"
#-----Dynamo Info change here------

dynamodb = boto3.resource('dynamodb')
table  = dynamodb.Table(TABLE_NAME)

'''
This Kinesis data(Json Image) is below
{
    "DEVICE_NAME": $device_name,
    "TIMESTAMP": $TimeStamp(yyyy-mm-ddThh:MM:SS),
    "HUMIDITY" : int,
    "TEMPERATURE" : int
}
'''
def checkItem(str_data):
    try:
        #String to Json object
        json_data = json.loads(str_data)
        # adjust your data format
        resDict = {
            DDB_PRIMARY_KEY:json_data['DEVICE_NAME'],
            DDB_SORT_KEY:json_data['TIMESTAMP'],
            "HUMIDITY": json_data['HUMIDITY'],
            "TEMPERATURE": json_data['TEMPERATURE']

        }
        print("resDict:{}".format(resDict))
        return resDict

    except Exception as e:
        print(traceback.format_exc())
        return None

def writeItemInfo(datas):
    ItemInfoDictList = []
    try:
        for data in datas:
            itemDict = checkItem(data)
            if None != itemDict:
                ItemInfoDictList.append(itemDict)
            # if data does not have key info, just pass
            else:
                print("Error data found:{}".format(data))
                pass

    except Exception as e:
        print(traceback.format_exc())
        print("Error on writeItemInfo")

    return ItemInfoDictList

def DynamoBulkPut(datas):
    try:
        putItemDictList = writeItemInfo(datas)
        with table.batch_writer() as batch:
            for putItemDict in putItemDictList:
                batch.put_item(Item = putItemDict)
        return

    except Exception as e:
        print("Error on DynamoBulkPut()")
        raise e

def decodeKinesisData(dataList):
    decodedList = []
    try:
        for data in dataList:
            payload =  base64.b64decode(data['kinesis']['data'])
            print("payload={}".format(payload))
            decodedList.append(payload)

        return decodedList

    except Exception as e:
        print("Error on decodeKinesisData()")
        raise e

#------------------------------------------------------------------------
# call by Lambda here.
#------------------------------------------------------------------------
def lambda_handler(event, context):
    print("lambda_handler start")

    try:
        print("---------------json inside----------------")
        print(json.dumps(event))
        encodeKinesisList = event['Records']
        print(encodeKinesisList)
        decodedKinesisList = decodeKinesisData(encodeKinesisList)
        # Dynamo Put
        if 0 < len(decodedKinesisList):
            DynamoBulkPut(decodedKinesisList)
        else:
            print("there is no valid data in Kinesis stream, all data passed")

        return

    except Exception as e:
        print(traceback.format_exc())
        # This is sample source. When error occur this return success and ignore the error.
        raise e
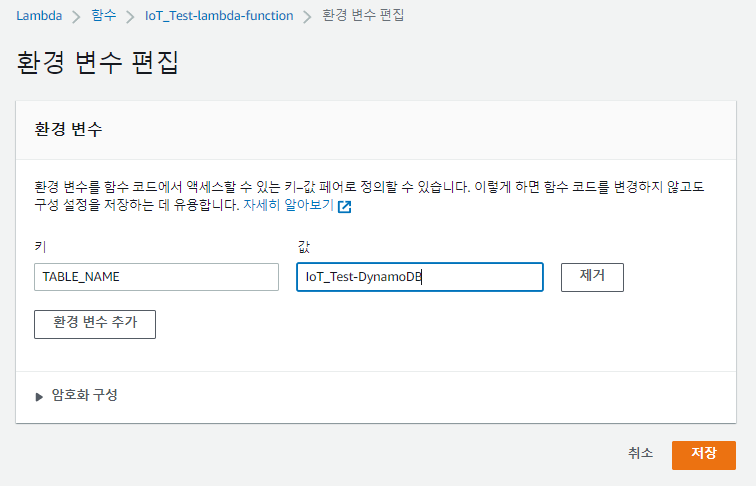
환경 변수 지정을 위해 설정을 들어가자 (구성 → 환경변수)
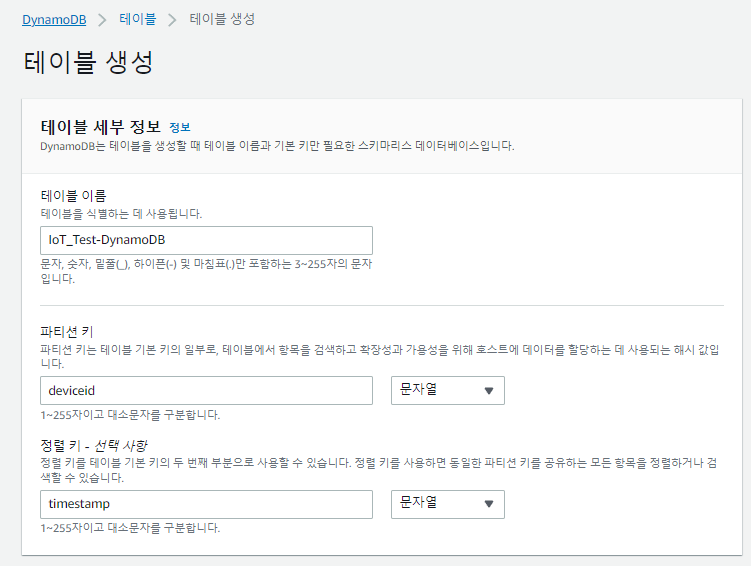
DynamoDB 테이블을 넣어주자
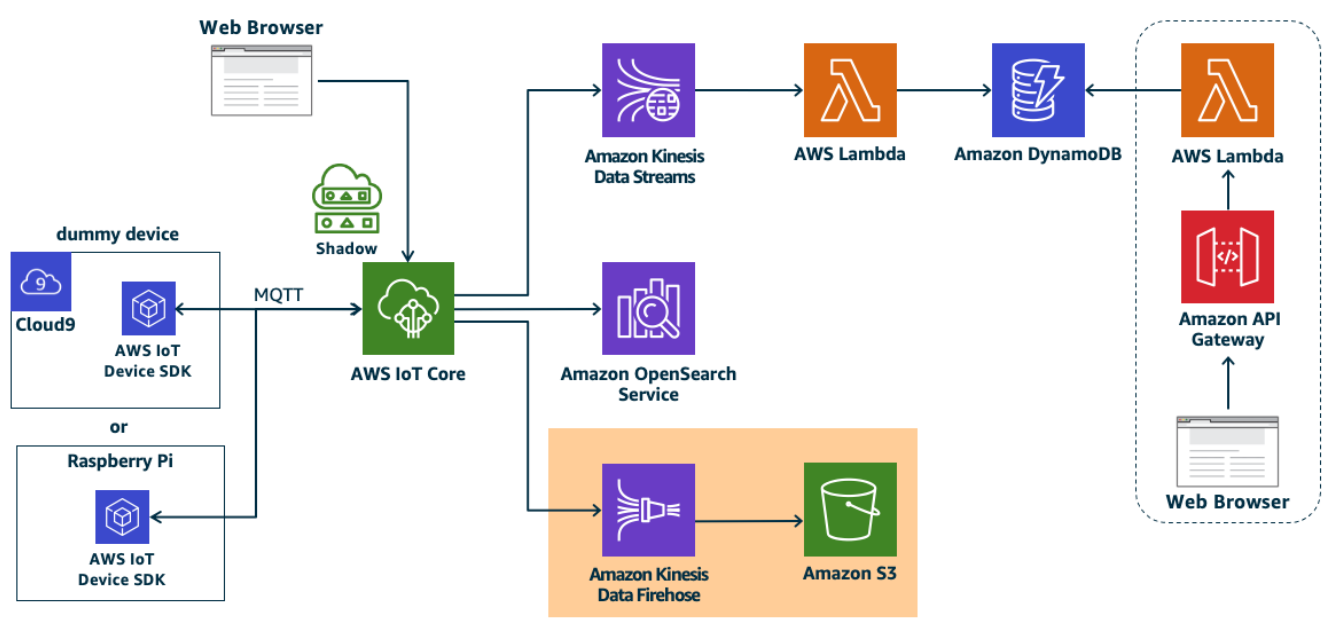
IoT Core 확인
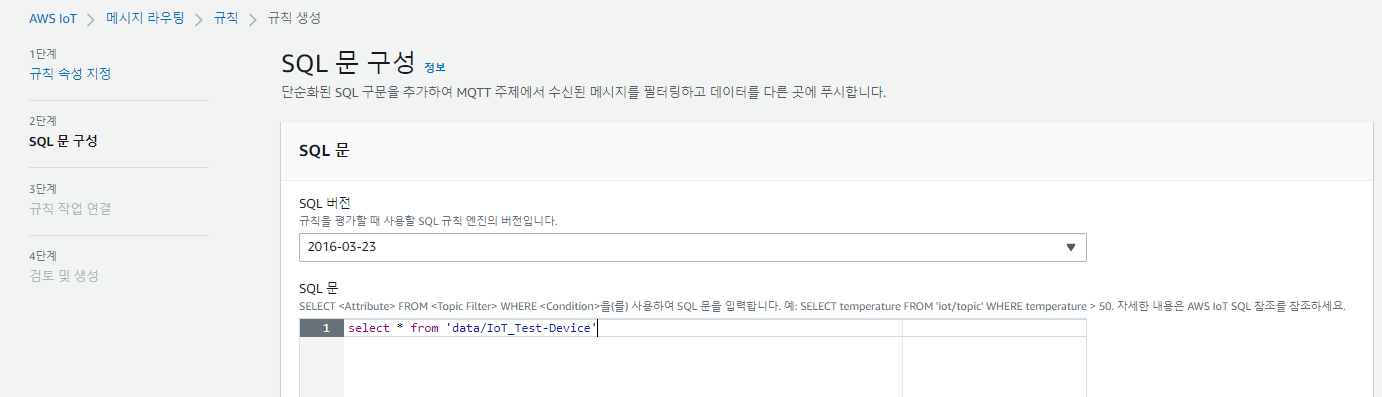
메시지 라우팅 규칙 생성
(메시지 라우팅 → 규칙)
from 뒤에는 아까 생성했던 디바이스의 topic을 넣어준다.
IoT와 Kinesis를 연결해준다. IoT 디바이스에서 데이터를 받아와 Kinesis로 흐르게
Role도 아까 생성했던 iot 역할로 지정해준다.
현재 iot 디바이스 연결도 잘 되어 있는 것을 볼 수 있음.
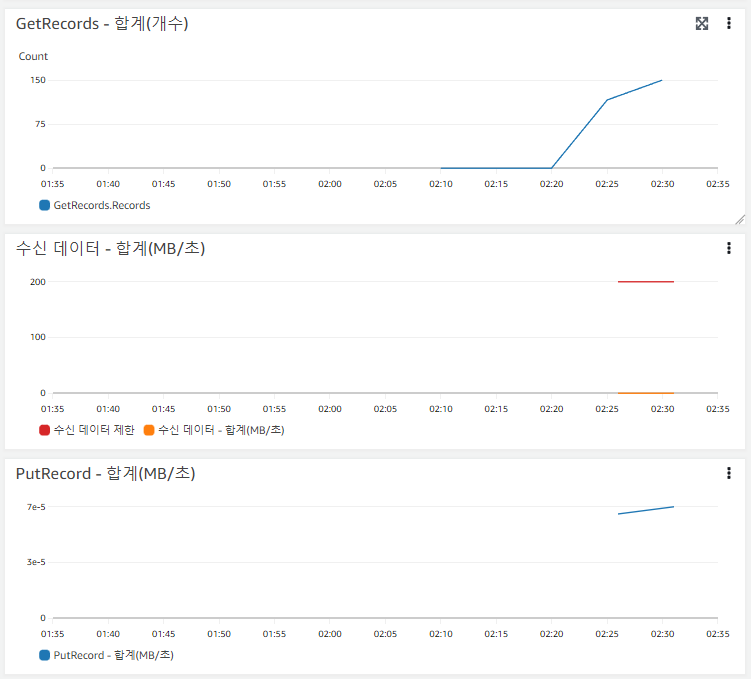
Kinesis Stream 모니터링
또, 위에서 연결했던 Kinesis의 모니터링을 보면 데이터가 잘 들어오는 것을 볼 수 있다.
(지표들 중에서 GetRecords - 합계 | PutRecords - 합계 값이 0이 아닌지 확인)
시간이 좀 지나야 해당 그래프를 볼 수 있음...!
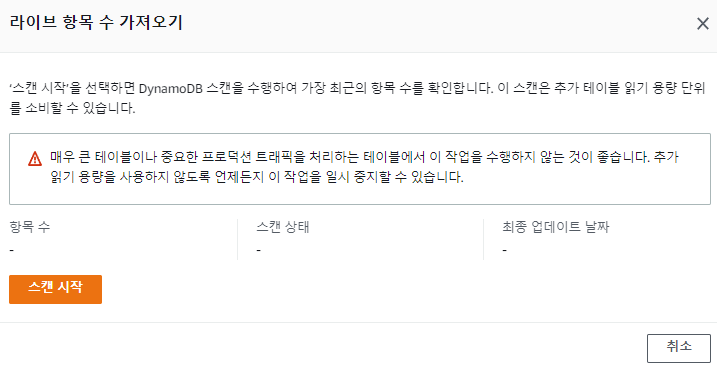
DynamoDB 모니터링
라이브 항목 수 가져오기 클릭
항목 탐색을 확인해보자.
Lambda 모니터링
(Invocations 그래프가 끝에 떨어지는 모양은 내가 cloud9 실행을 멈췄기 때문/ 스크립트 계속 돌리면 그래프 유지됨.)